
Instructions
Master your recovery: Step-by-step instructions on how to put on the ArmLock brace
Jump to video tutorial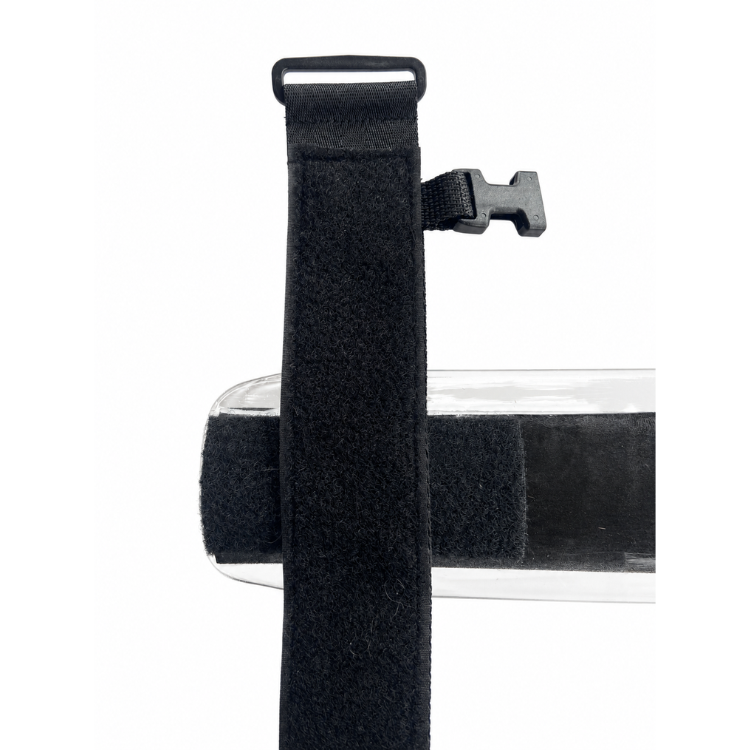
Step 1
Attach the strap.
Attach the strap to the top of the rigid brace as high up as possible. Do not allow the strap to cut into the armpit. Buckle points towards the glove.
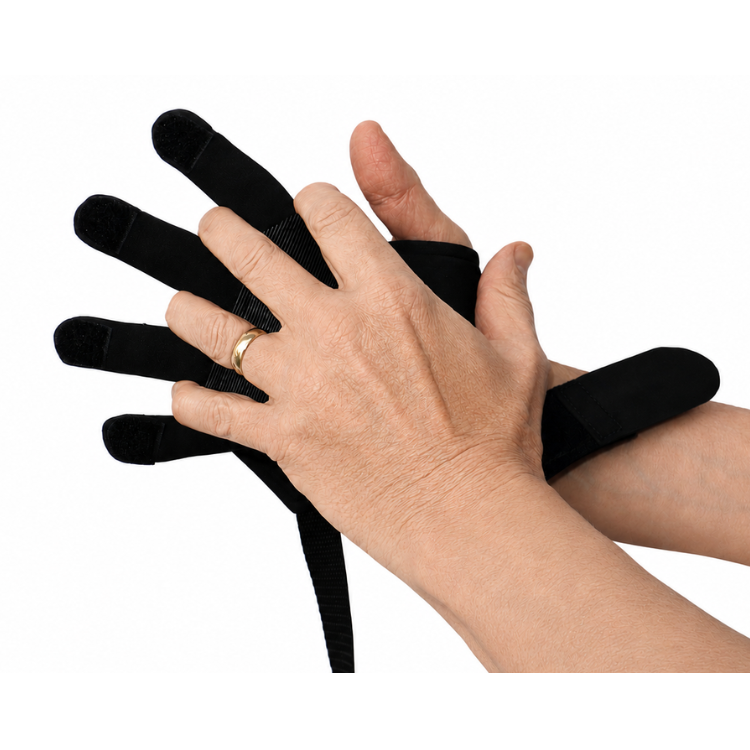
Step 2
Push fingers to the tip of the glove.
Fingers need to be at the very tip of the glove.
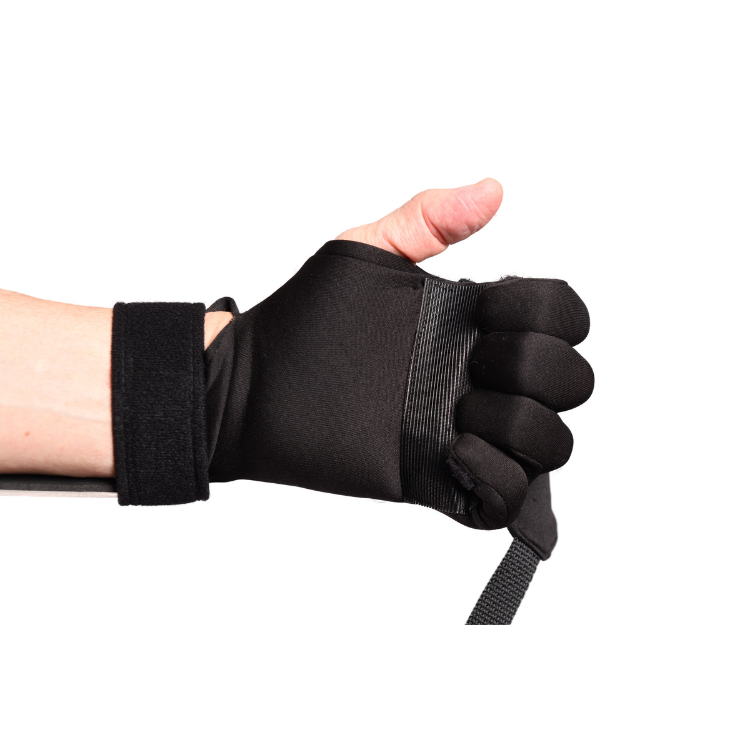
Step 3
Fold fingers in towards the palm.
Make a tight fist to attach the velcro at the fingertips to the velcro on the palm.
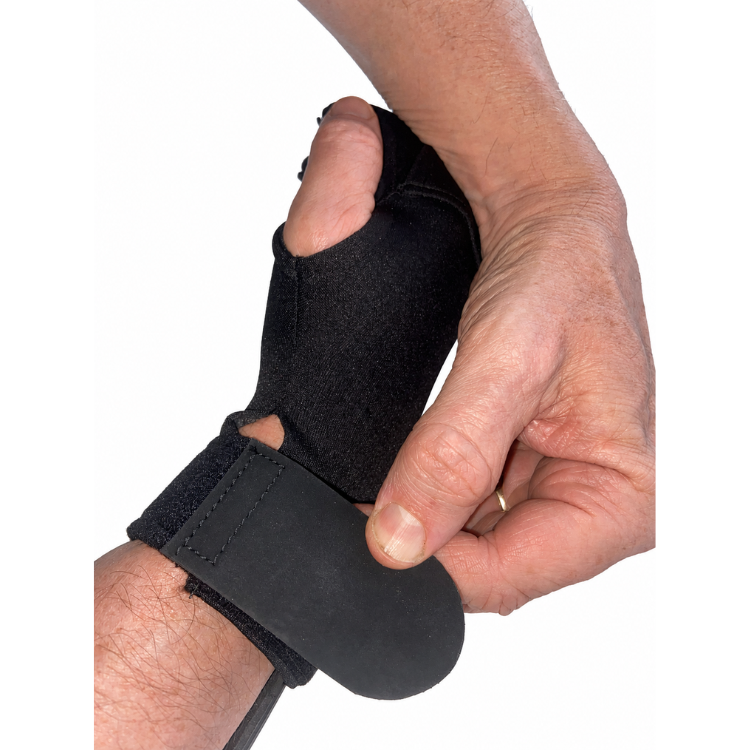
Step 4
Tighten wrist strap firmly.
The wrist strap needs to be fastened around the wrist.
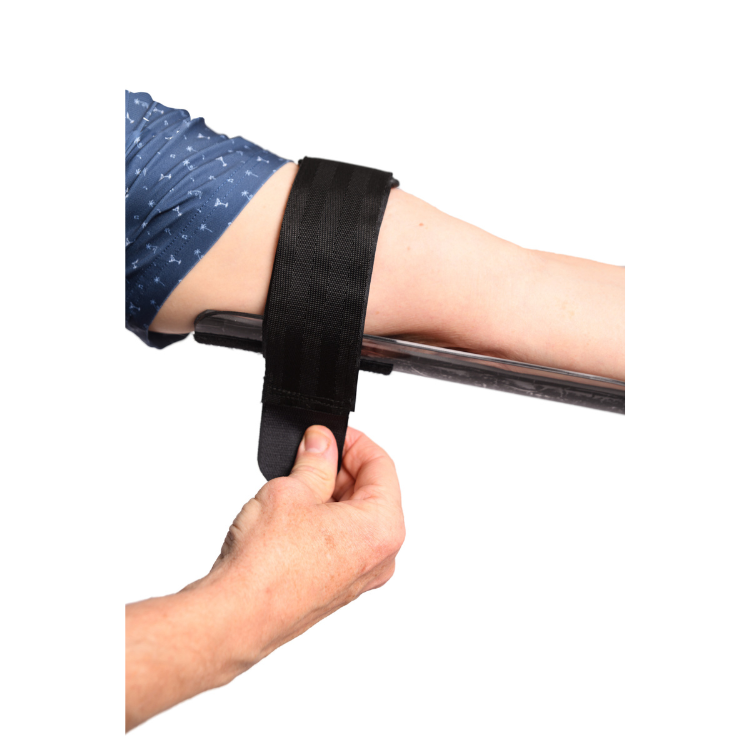
Step 5
Tighten upper arm strap.
Make sure the plastic support is behind the elbow and tighten the upper arm strap, but not too tightly.
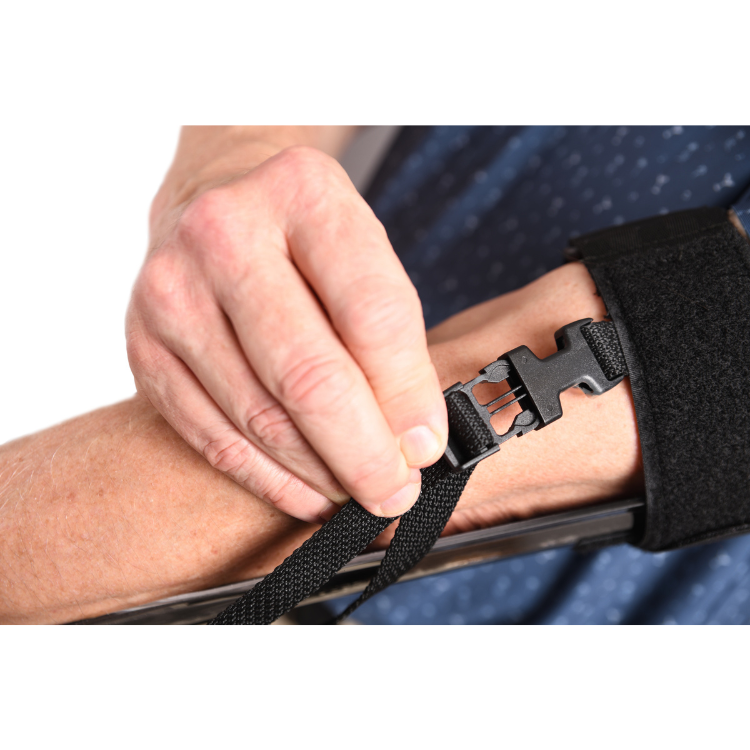
Step 6
Fasten arm strap.
Bend wrist down, reach over your arm, and clip the long strap to the outside of the upper arm.
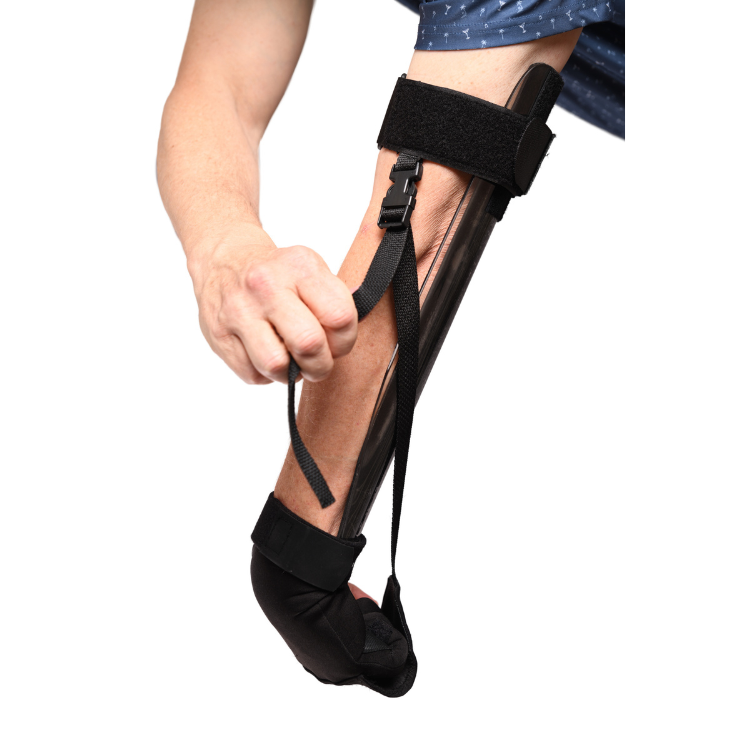
Step 7
Tension the arm strap.
Pull the strap to a comfortable, gentle level of tension. Do not stretch your wrist into greater than 90 degrees of flexion. The objective is to stretch the muscles on the back of the forearm, not to stretch the wrist. The focus is on the duration of the stretch and NOT the intensity of the stretch. Start with 10 minutes on the first day and progress to a half an hour per day.
Still confused? Watch our video tutorial!
Watch Mark Laurensse explain how to put on his brace.